Clients can modify the ADAM header logo and branding cascading style sheet (CSS).
Changing the Logo
- Go to System > Client Settings.
- Click the Design tab.
- Click the Choose a file or drop it here field or the Browse button, and then search for and select the image file you want to use. You can also drag and drop and image file into the field.
- Click the Submit button at the bottom of the page.
The header logo is displayed in the top left of the ADAM header. We recommend using a transparent gif file, so you don't need to worry about the background colors. A non-transparent image will work if you match the logo background to the background color of the header row.
Note: If the logo is wider than the Navigation (navbar), then the logo will span across two different background setting styles set in the Custom Branding CSS section.
- This style controls the background color in the header row above the navigation panel
.topbar .top-navbar .navbar-header {
background: #c0c3c7;
} - This style controls the background color in the header row above the main page area.
#adam-header {
background: #c0c3c7;
}

Updating the Custom Branding CSS
Styles are set by default with a new tenant.
- Go to System > Client Settings.
- Click the Design tab.
- Edit the Custom Branding CSS as needed. A common style sheet is used throughout ADAM. Changes to the CSS are only applied to your tenant.
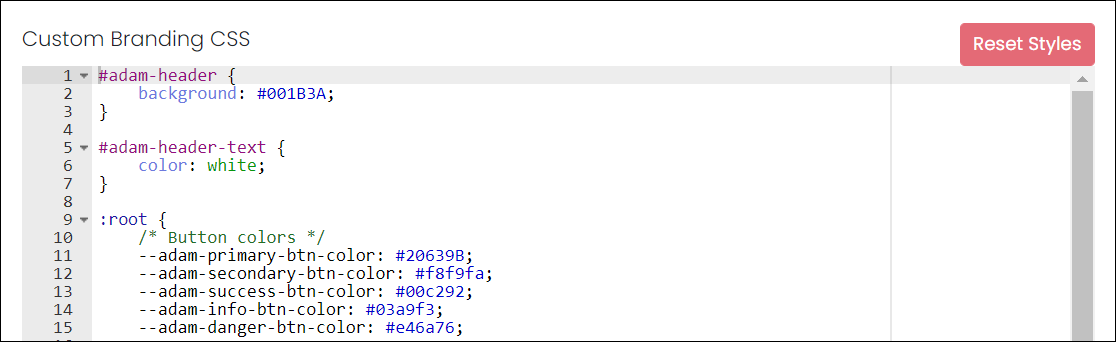
- Click the Submit button at the bottom of the page.
- If you need to revert back to the default styles, click the Reset Styles button.
Note: You will not be able to re-apply your custom styles after resetting styles.